
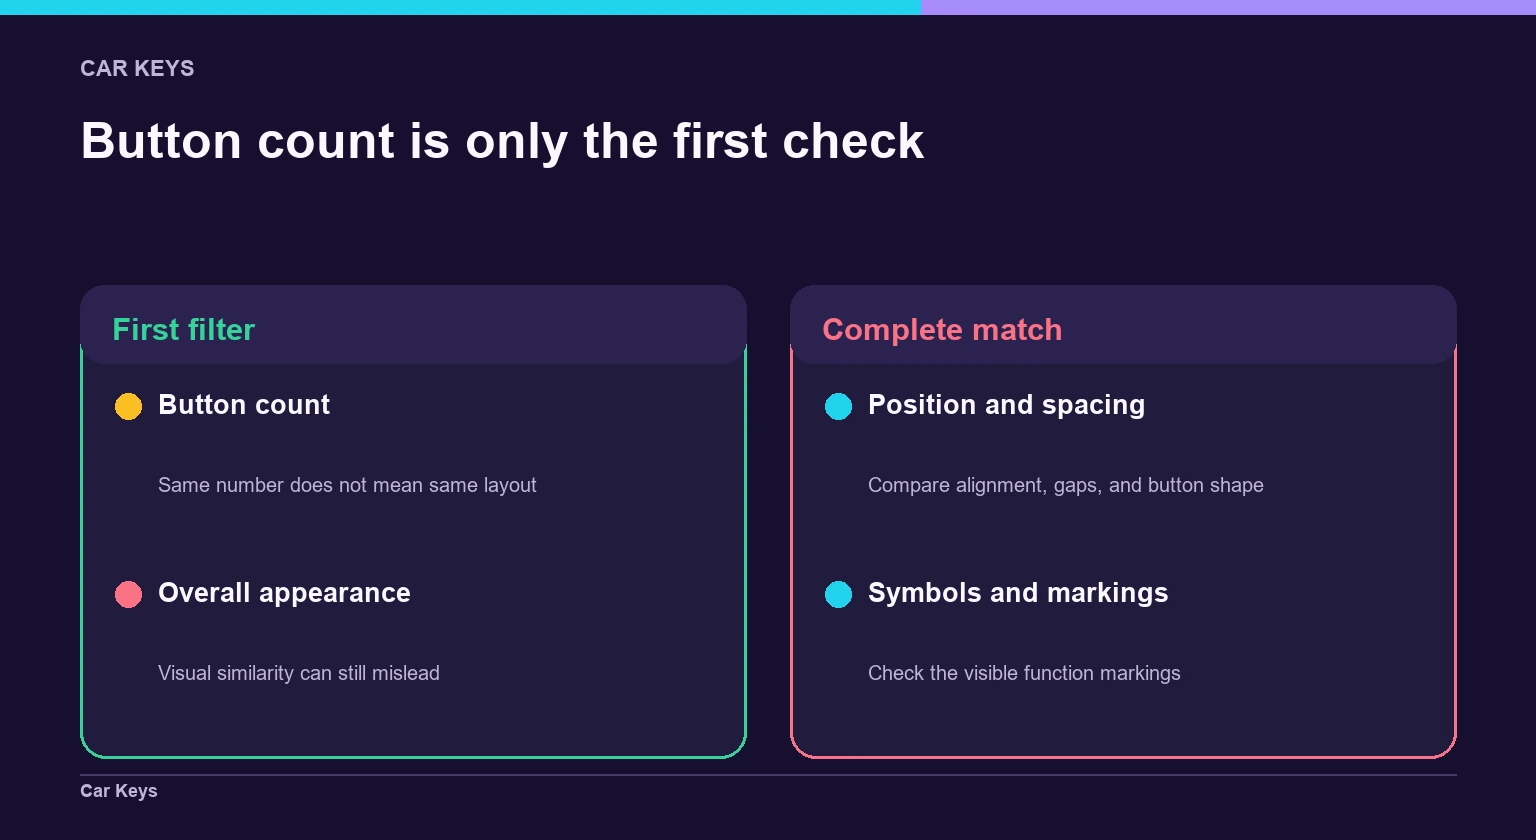
- Matching the number of buttons is only an initial filter because identical counts can use different positions, shapes, spacing or functions.
- Compare the original key from the front, back and side because housing contours, seams and thickness can distinguish otherwise similar shells.
- Button markings and symbols may indicate functions, but their arrangement should still be compared with the original rather than assumed from appearance alone.
- A compatible shell must leave the original circuit board, battery and transponder area correctly supported; external button alignment cannot confirm internal fit.
- The key-blade style, attachment point and folding or fixed design are separate compatibility checks that button layout does not resolve.
- Vehicle make, model and year help narrow the search, but the original key’s physical details remain necessary before compatibility is treated as confirmed.
The number of buttons is only the first check when choosing a replacement car key shell. Two shells may both have three buttons yet differ in the car key shell button layout: the buttons can be arranged differently, shaped for another housing, or positioned to match a different internal circuit board. A shell that looks close may therefore fail to hold your existing components or leave the buttons misaligned.
Start by comparing the front of your current key with the replacement: count the buttons, note their order, and check their shapes and symbols. Then look beyond the face of the shell. The housing profile, seam, battery-cover design, screw or clip positions, transponder space, circuit-board supports and key-blade fitting can all affect compatibility. The blade may be fixed, removable, folding or cut in a different style, so its appearance and mounting method also matter.
This guide explains how to use the button layout as a quick visual filter, how to compare the shell’s physical shape and interior, and which details require closer checking before you buy. It also highlights why a matching layout does not, by itself, prove that a shell is suitable for your key.
Why Button Count Is Only the Starting Point
The number of buttons is a useful first filter, but it does not identify a shell by itself. Two replacement shells may both have three buttons while placing them in different positions: one may use a vertical column, while another uses a row, offset controls or a larger button above two smaller ones. If the original key fob has a different key fob button arrangement, the shell can look nearly correct in a listing and still be the wrong choice.
Button shape and spacing provide additional identification clues. Compare whether the controls are round, oval, rectangular or joined into one moulded panel. Check the gaps between buttons, the distance from the edge of the housing and the amount of plastic surrounding each control. A shell with the right button count but narrower spacing may have been designed for a different housing shape. Likewise, two keys can have similarly sized buttons but use different proportions, such as one large central control and several smaller controls around it.
The markings also matter, but they should not be treated as universal standards. Lock, unlock, boot or other symbols can differ between designs, and similar-looking icons may represent different functions on different vehicles. Some shells use printed symbols, while others use raised or recessed markings. A blank button area can also be intentional rather than evidence that a button is missing. For car key shell identification, compare the exact symbol style and its position rather than relying only on the apparent function.
Visual similarity can be misleading for several reasons. Product photographs may show a shell from an angle that hides spacing differences, or the image may represent a general design family rather than every version sold. A glossy finish, dark plastic and familiar outline can make an unsuitable casing appear convincing. Orientation can cause confusion too: a mirrored or opposite-side arrangement may seem correct until the key is viewed with the same top and bottom orientation as the original.
Treat the button count as a screening tool, not a compatibility decision. Before considering a replacement car key shell, require agreement in three areas: the number of controls, their exact positions and spacing, and the shape and markings of each button. If any of these differ, appearance alone is not enough to confirm key shell compatibility.
- Count the buttons first.
- Then compare position, shape, spacing and orientation.
- Treat symbols as supporting clues, not final proof.
- Continue with housing, internal and blade checks.
How to Compare the Original Key With a Replacement Shell
Place the original key and the replacement car key shell next to each other on a flat, well-lit surface. Start with the front face, keeping both keys in the same orientation—for example, with the logo or top edge facing upward. Compare the outline, corners, button openings and the distance from each opening to the edge of the housing. A shell can have the same overall number of controls but still be unsuitable if one button sits higher, closer to a corner or on a different centre line.
Check the car key button positions one at a time rather than judging the face as a whole. Note whether the openings are centred, offset, evenly spaced or arranged around a larger control. Compare their width, height, shape and orientation. For example, a long oval opening should not be treated as equivalent to a shorter rounded opening simply because both accommodate a single button. Also check whether the top and bottom edges of the openings run parallel with the shell edge.
Turn both pieces over and compare the back view. Look for differences in the rear cover’s outline, raised sections, recesses, logo area and the position of any visible release or access feature. These details help with car key shell identification when the front faces look similar. Do not assume that a matching front proves key shell compatibility; a different back profile can indicate a different casing design.
Examine the keys from the left, right and top edges. Compare the housing thickness, the way the front and rear sections meet, and the position of the seam around the case. The seam should follow a similar route around the replacement shell rather than moving noticeably closer to a button opening or an end corner. Check whether the side surfaces are straight, stepped or curved, and whether the front face sits at the same angle relative to the edge.
Use fixed reference points to avoid being misled by perspective. Align the top edge, then compare the centre line of the case, the spacing between openings and the distance from each opening to the nearest edge. If the original has an asymmetrical arrangement, mark its orientation before comparing it; rotating a shell can make an incorrect layout appear closer than it is. A ruler placed beside both keys can help reveal small differences in length, width or button spacing, but it is not a substitute for matching the complete shape.
For difficult comparisons, take clear photographs of both keys from the front, back, top and each side. Keep the camera directly above the front and back views, use the same scale, and avoid wide-angle phone settings that distort the edges. Add a ruler or grid beside—not underneath—the key, and label which end is the top. Compare those images with the listing, but do not treat a product photograph as proof of compatibility unless the physical details match. Model-specific visual patterns still require manual verification against the original key.
Check the Housing Shape and Internal Layout
A matching external button pattern is not enough if the replacement car key shell has a different cavity. Compare the housing’s contours, thickness and depth, especially around the edges, corners and button area. A shell with a flatter back, a thicker rim or a narrower internal cavity may prevent the original components from closing correctly, even when the front appears almost identical.
Inspect the shell’s physical structure
Check where the two halves meet. The shell seam should follow a similar path to the original, and its clips, screw posts and other fastening points should be positioned consistently. If the screw locations do not line up, the shell may not close securely or may require pressure that could damage the housing. Different seam positions can also leave the circuit board sitting at the wrong height beneath the buttons.
Look at the internal supports rather than judging the shell by its outside shape alone. The circuit board should have defined seating points that hold it flat and prevent sideways movement. Compare the location of guide rails, ledges, clips and locating posts with the original housing. A board that fits loosely may shift during normal use, while one that is forced into place can press against the buttons or become damaged when the shell is tightened.
The battery compartment needs the same check. Confirm that the replacement shell places the battery in the same general position and provides the correct retaining features, such as a shaped recess, clips or a contact area. A different battery position can interfere with the circuit board or leave the battery unsecured. Do not assume that a shell using the same battery type will have the same internal arrangement.
Check clearances for every transferred part
Allow space for the transponder and any other small original components that sit inside the housing. Some shells include a dedicated pocket or channel; others rely on a close-fitting area near the end of the case. The replacement must leave enough clearance for the component without allowing it to rattle, become trapped or sit against a closing edge.
Internal layouts vary by key design and vehicle application, so visual similarity cannot confirm key shell compatibility. If you can inspect both housings, use the original shell as a map: note the component positions, mounting points and free space before transferring anything. If the listing shows only the outside, request clear internal photographs or treat the fit as unverified. Do not assume that a circuit board or transponder will transfer simply because the button openings and outer shape look correct. A shell is suitable only when its cavity supports the original parts without forcing, shifting or obstructing them.
Verify the Key Blade and Folding Design Separately
A shell can match the original car key button positions and still be incompatible because the physical key is different. First identify whether the original uses a fixed blade or a folding blade. A fixed key has a blade permanently extending from the housing, while a folding design stores the blade inside the casing and releases it around a pivot. These housings are not interchangeable merely because their button layout looks the same.
For a folding key, compare the hinge area carefully. Check the blade’s pivot location, the width and shape of the hinge supports, and the feature that holds the blade open or closed. This may be a pin, screw, spring-loaded mechanism or another retention arrangement. The replacement shell must provide the same physical attachment points and enough clearance for the blade to rotate fully. A housing with a similar outline but a differently placed pivot can leave the blade loose, misaligned or unable to fold.
Next, compare the blade profile rather than only its visible length. Look at the shape of the blank, the shoulder near the head, the groove or channel pattern, and the way the blade meets the key housing. Two blades may have similar teeth yet use different profiles or different attachment methods. Also check whether the original blade is a separate insert, permanently joined to the housing or held by a retaining pin. These details are central to key shell compatibility.
Do not assume that a replacement shell’s blank blade will match the original. Blank blades can differ in profile, thickness, shoulder position and head design. A listing may show the correct folding style while supplying a blank that cannot be used with the original key arrangement. Manual comparison of the original blade and the replacement’s blade specification is necessary for each application.
Remote-shell compatibility does not prove blade compatibility. If the casing accepts the same general electronics and has the same external form, that only addresses part of the inspection. Treat the blade as a separate decision: proceed only when its profile, attachment point and movement or retention features also correspond. If any of these cannot be confirmed from clear photographs or measurements, do not assume the blade can be cut, replaced or transferred; resolve that specific design difference first.
What to Confirm Before Choosing a Replacement Shell
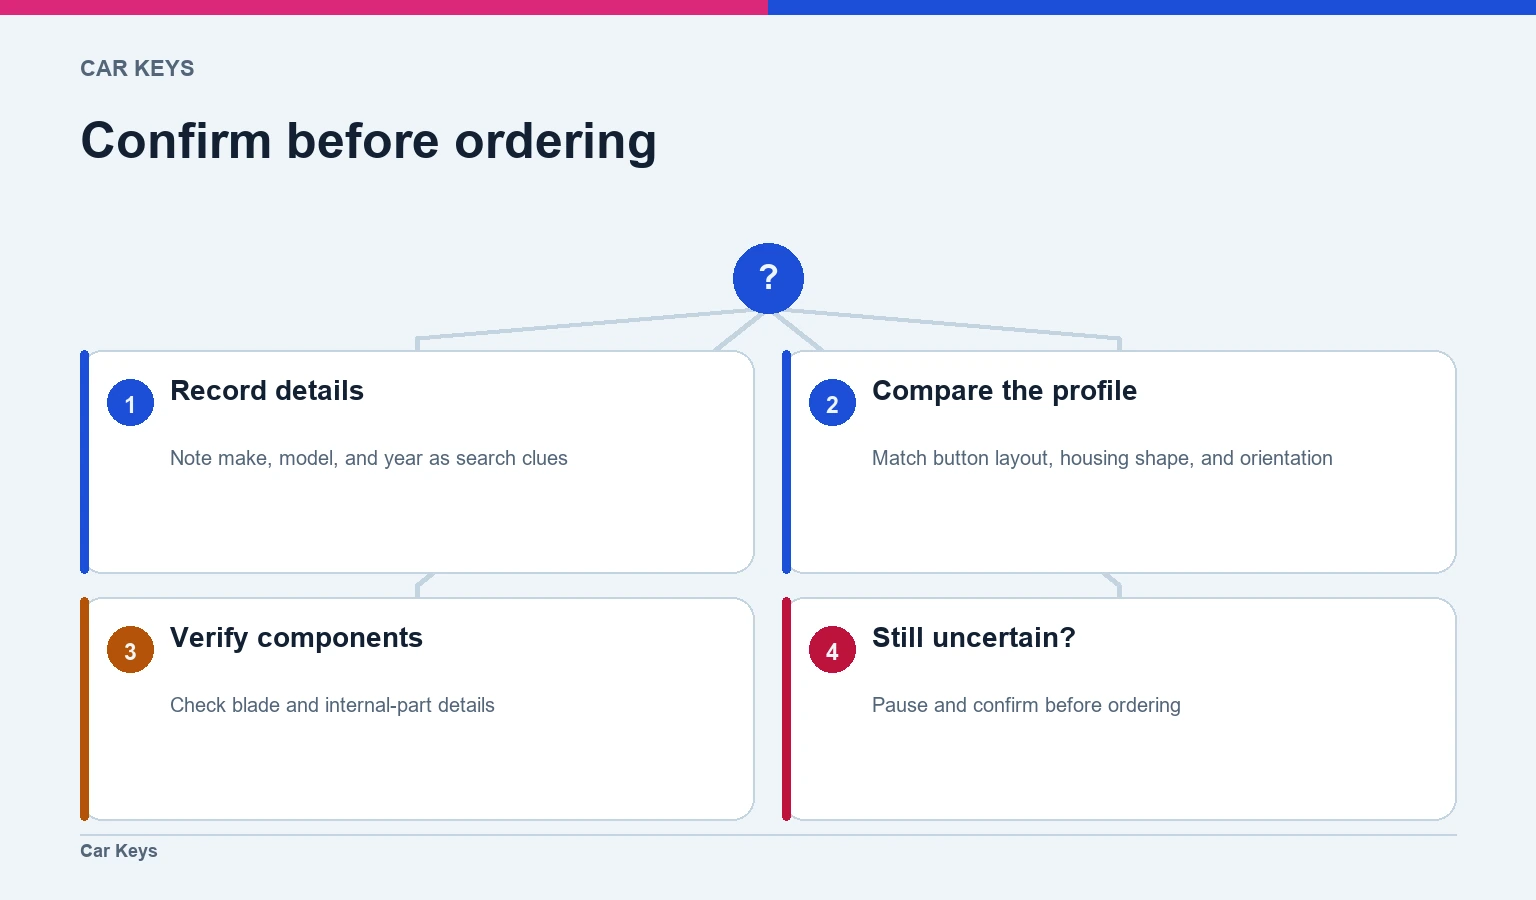
Before ordering, create a short identification record for the original key. Note the vehicle make, model, model year and, where relevant, trim or body style. Use these details as search clues rather than as proof of compatibility: listings can group similar vehicles together, while the same model may use different key designs across years or markets. The original key remains the main reference for confirming the car key shell button layout.
Check the complete profile against the listing, not just the number of controls. Confirm the overall outline, button arrangement, logo position, seam direction, thickness and the location of any screw, clip or hinge. Compare the key in the same orientation as the product photographs. If the listing shows only one angle, ask for or locate additional views before buying. Clear photographs of the front, back and side can reveal an offset button, different corner shape or altered housing depth that a front-facing image hides.
Where dimensions are provided, compare them with the original using the same reference points. Measure overall length and width, and check the distance between important edges or openings rather than relying on a general impression of size. Dimensions are useful supporting evidence, but they do not replace a physical comparison: two shells can have similar outside measurements while differing inside. Treat missing measurements as an unresolved point, not as confirmation of key shell compatibility.
Confirm the component and blade details separately before deciding. The listing should indicate whether it is an empty housing, includes buttons, or includes a blank blade. Check whether the original circuit board, battery holder, rubber keypad and other retained parts have corresponding support points in the replacement. Also compare the blade profile, attachment point and folding hardware with the original. A shell may match the car key button positions yet still require a different blade or an unsuitable internal component arrangement.
Use a simple decision rule: buy only when the vehicle information, complete visual profile, component details and blade design all agree. If one important feature remains uncertain—such as an unclear rear view, missing dimensions, an ambiguous blade description or a different internal shape—pause and contact the seller with focused questions. Ask for the exact measurements or underside photographs, and check the relevant product’s fitment notes, documentation and return terms before committing. Those details vary by seller and product, so they must be verified rather than assumed.
The practical takeaway is simple: do not choose a replacement shell by button count alone. Compare the original key with the candidate from every relevant angle—button positions and symbols, housing shape, circuit-board and battery layout, mounting points, and key-blade style. A shell that looks similar may still be unusable if one of these details differs. If you cannot confirm the match from clear photos, dimensions, or part information, pause before ordering and verify compatibility with the seller or a qualified key professional. This small check can prevent buying a shell that cannot house your existing parts.
- Photograph the original key from the front, back and side.
- Record make, model and year as search information.
- Match the shell’s housing contours and thickness.
- Check internal component support.
- Verify the blade and folding design separately.
Choose the option that matches your vehicle and situation.
Frequently asked questions
Can two car keys with the same number of buttons use different shells?
Yes. Button count identifies only one feature. Two keys may have different button positions, shapes, spacing, opening sizes, housing contours, or internal support points despite having the same number of buttons. Compare the complete front layout and housing design with the original key rather than choosing a shell based on button count alone.
Should I compare the symbols or the physical button openings first?
Check both, but give priority to the physical layout. Button symbols may look similar or vary between versions, while the position, size, spacing and shape of each opening must correspond to the original key. A shell with familiar symbols can still be unsuitable if the buttons do not sit over the controls correctly.
What if the replacement shell looks right from the front but is thicker?
A thicker shell can prevent the circuit board, battery or other components from seating correctly. It may also stop the two halves from closing fully or leave the buttons with too little movement. Compare the side profile and internal depth, not just the front face, before treating the shell as compatible.
Can I confirm shell compatibility from my car’s make, model and year?
Vehicle details can narrow the search, but they do not confirm compatibility on their own. The same vehicle information may be associated with more than one key design. Use the make, model and year together with the original key’s button layout, housing shape, blade arrangement and internal features.
How can I check a shell if my original key is damaged?
Take clear photographs of every remaining side, including the front, back, edge and blade or hinge area. Record any readable part numbers or markings, and photograph the damaged shell before disassembly if possible. Treat the match as unconfirmed until the replacement’s physical features correspond with those views.
Does a matching button layout mean the circuit board will fit?
No. External button alignment only shows that the controls may line up. The circuit board also needs the correct cavity, supports, guides, retention points and clearance for the battery and other components. Confirm the internal layout separately, especially when product photographs show only the outside of the shell.
Are folding and fixed key shells interchangeable?
Not necessarily. A folding shell requires the correct hinge, pivot area and blade attachment, while a fixed shell uses a different housing arrangement. Even identical-looking button layouts cannot establish interchangeability. Check the blade style, attachment method and key movement separately from the buttons and outer shape.
What should I do when a product listing shows only one angle?
Look for additional photographs or ask the seller for clear front, back and side views, plus images of the inside if available. A single front image cannot confirm thickness, blade attachment or internal supports. Until those details match the original key, treat the shell as a possible—not confirmed—fit.
