
A practical fit check for button layout, shell shape, blade arrangement and transferable key components.
- A two-button layout narrows the search, but it does not by itself prove that an Opel Insignia key shell will fit.
- Compare the replacement shell’s outer profile, button positions, seam, blade opening and internal recesses with the existing key.
- A replacement shell may preserve original electronics only when the circuit board, battery arrangement and transponder can be transferred correctly.
- A shell with the wrong blade format can leave the remote usable while making the physical key unsuitable for the vehicle.
- Changing the outer casing is different from replacing or programming a complete remote key, so the article must keep those tasks separate.
- Product-specific fit still requires checking the seller’s current dimensions, images, component contents and compatibility information before ordering.
Choosing an Opel Insignia key shell by vehicle name and button count alone is not enough. A two-button shell may still differ in its outer shape, blade position, hinge or screw arrangement, and the space available for the original electronics. The key distinction is between physical shell compatibility and whether the key’s blade, transponder and remote components can be transferred and used correctly.
Before ordering, compare the key you have with clear product photos rather than relying only on the listing title. Check the number and position of the buttons, the outline of both halves, the blade’s location and folding direction, and the way the case is opened and secured. Then consider what must move into the new shell: the remote board, battery holder, rubber button pad, transponder and, where applicable, the existing blade.
This guide explains how to make that comparison in a practical order and where visual matching stops being enough. It also clarifies why a shell can look correct yet fail to accommodate the original components, and why a replacement case does not automatically provide a programmed key. That distinction is especially useful when comparing online listings or arranging key work in Lithuania, where similar-looking Opel parts may be offered under broad model descriptions.
A Two-Button Opel Insignia Key Is Only the Starting Point
A two-button description is useful, but it does not identify every Opel Insignia key shell. The model name and button count are only initial clues. Different production years, generations, key designs and blade arrangements can affect whether a replacement shell is relevant. Treat “Opel Insignia two-button key shell” as a search starting point, not as proof of compatibility.
First, record the vehicle’s exact model year or generation if you know it. Check the vehicle documents, the original key documentation or another reliable record rather than relying on memory. If the vehicle has changed hands or has more than one key, note which key you are trying to replace. A listing that mentions only “Insignia” and “two buttons” may not provide enough information for a safe order.
Next, document the complete existing key before opening or disassembling it. Take clear photographs of both sides, including the front, back, button area and the end where the blade is positioned. Then photograph the key opened, if it is designed to open without damaging the casing. The open-key image can show whether the interior arrangement appears to correspond with the product description, while the exterior images preserve details that may be difficult to remember later.
Record the physical format of the key as well. State whether it has a fixed blade, a folding blade or a removable blade. These are not interchangeable descriptions: a two-button Opel remote with a folding mechanism should not automatically be treated as equivalent to a fixed-blade key. Also note whether the blade is part of the casing, attached separately or absent from the item you intend to order. Detailed blade and casing comparisons should be made in the later checks, but this basic classification helps prevent an obviously unsuitable search result.
Read the product scope carefully before comparing photographs. A replacement Opel key shell may mean the outer casing only, while another product may include buttons, a blank key blade or other parts. Do not assume that the pictured item contains everything shown in a marketing image. For readers ordering in Lithuania, save the listing, its stated model information and the seller’s fitment wording before purchasing; this makes unclear descriptions easier to query.
Use a simple decision rule: proceed to the physical comparison only when the vehicle information, existing-key format, photographs and product scope are all recorded. If any of these is unknown, model-and-button matching remains too weak to confirm key shell compatibility. The next check should compare the replacement shell’s actual design with the complete existing key, not just the number of buttons.
- A two-button description is not a fit guarantee.
- Do not discard the original shell until every component has been checked.
- Do not assume a similar-looking blade or transponder arrangement will work.
Compare the Replacement Shell’s Physical Design
Place the original key beside the product photographs and compare the complete outline, not just the number of buttons. Check the length, width, rounded corners, side taper and overall thickness. A shell can look similar from the front yet be noticeably deeper or narrower, leaving the original parts loose or preventing the two halves from closing. If the seller lists dimensions, compare them with measurements taken from the original casing. Treat measurements as useful evidence, but confirm that they apply to the exact Opel Insignia key shell shown in the listing.
Check the outside shape and controls
Look at the button layout from several angles. The button symbols should be in the same order, and each button should sit at the same distance from the edges. Compare the size, shape and spacing of the button openings or flexible button pads. Also consider the expected travel: a button that is too shallow, too tall or positioned slightly off-centre may press continuously, fail to reach the switch or feel unusually stiff.
Do not rely on a photograph taken from only one side. Ask for, or find, clear images of the front, back, sides and open shell. Product images may show a different revision or a generic Opel key casing than the one being sold. If the listing does not make the variant clear, request confirmation before ordering rather than assuming that an Opel Insignia two-button key shell will match every two-button Opel remote.
Next, compare the seam where the casing halves join. The seam should follow the same route around the key, with matching corners, cut-outs and joining points. Check whether the original uses clips, screws, a pin or another visible fastening arrangement, and whether the replacement shell provides corresponding locations. A different seam can indicate a different mould, even when the outer silhouette appears correct. It may also leave a gap, create pressure on the buttons or make the casing difficult to close.
Inspect openings and retaining details
Examine the blade opening and hinge area without assuming that their appearance proves mechanical compatibility. The opening should have the same position, width and surrounding shape as the original, while the hinge area should match in length, depth and end shape. Pay attention to small shoulders, channels and stop surfaces: these features control how nearby parts sit and can be absent from low-detail photographs.
Finally, compare the internal recesses, guide rails, posts, clip locations and retaining ledges visible when the shells are open. These details must correspond closely; a cavity that is merely similar in size may not hold the existing components securely. Before ordering in Lithuania or elsewhere, confirm with the seller which retaining parts are included—such as pins, clips, screws or button pads—and whether the photographs and listed dimensions represent the exact variant supplied. If several physical details remain uncertain, mark the shell as unconfirmed rather than treating model name and button count as sufficient proof.
- Photograph the existing key
- Compare the complete outer profile
- Check the blade opening and format
- Compare the opened internal layout
- Read the current product contents and compatibility information
Check Whether the Original Internals Can Move Across
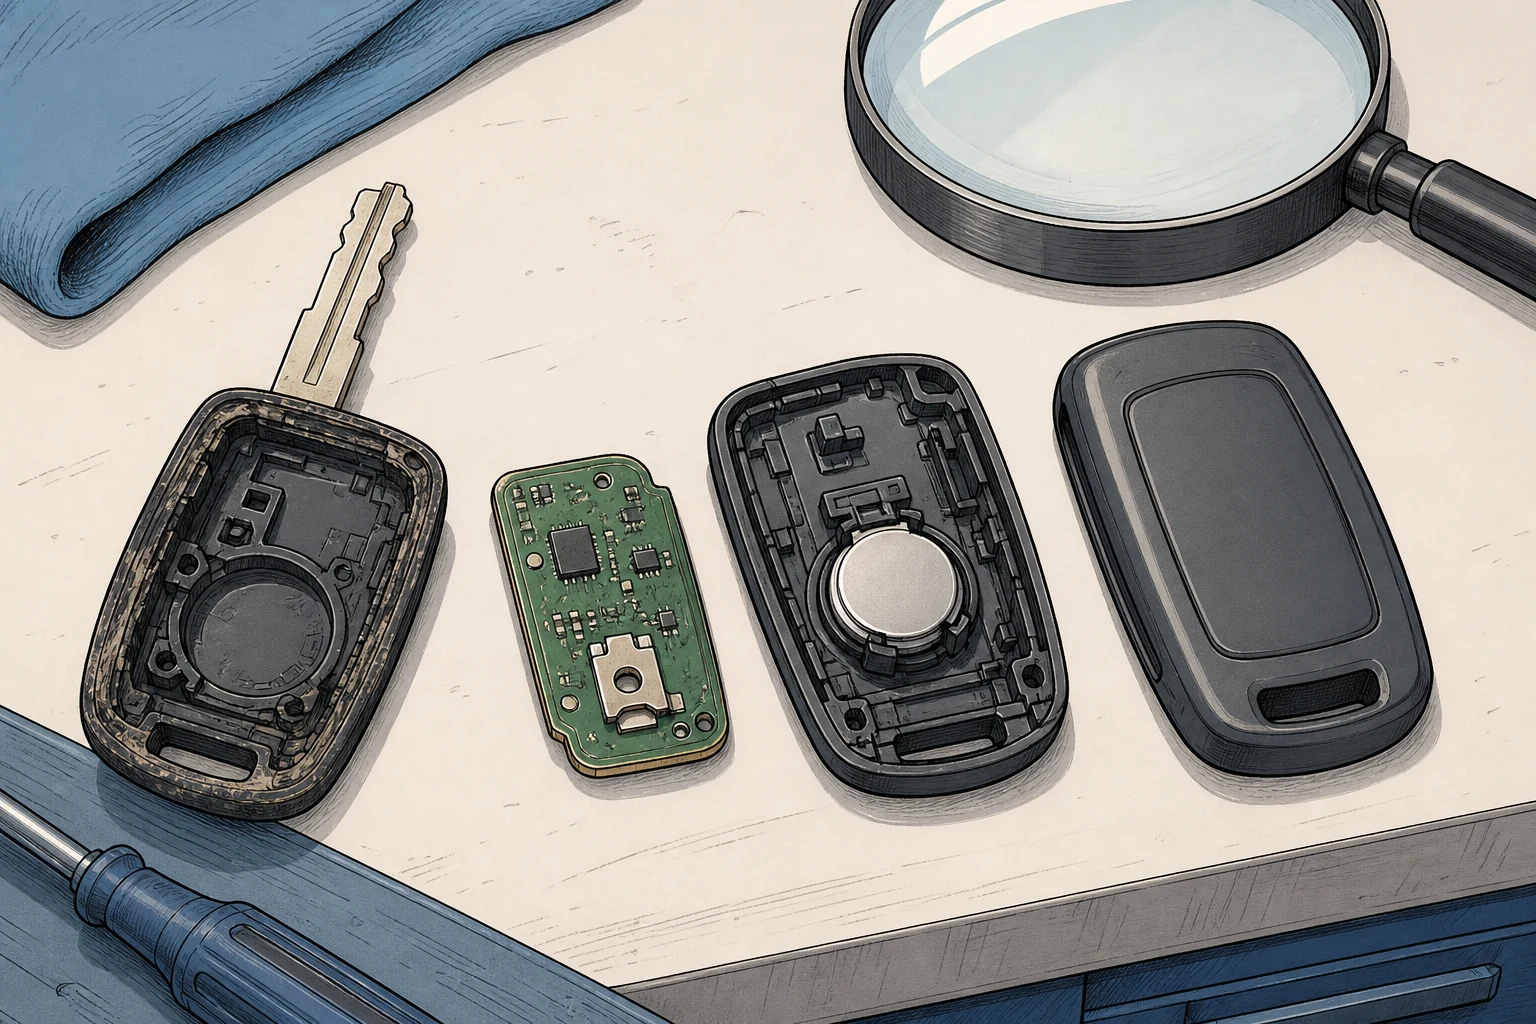
A visually matching Opel key casing is not enough if the original electronics cannot be installed securely. Before ordering, open the product listing’s diagrams or internal photographs and compare them with the inside of your existing key. Check whether the replacement Opel key shell is designed for the same circuit-board shape, screw or clip positions, guide rails and locating posts. A board that fits the outline but lacks the correct supports may move inside the casing, press against the buttons or prevent the halves from closing.
Compare the board’s position relative to the buttons as well. The contact points must sit directly beneath the replacement button pads, with enough clearance for normal button travel. If the listing shows a differently shaped board recess, different retaining clips or an extra unused cavity, treat that as a compatibility warning rather than assuming the difference is harmless. Ask the seller for an internal view or exact compatibility information for the particular key variant if the product photos are incomplete.
Battery placement is another practical check. Identify the battery type and whether the holder is attached to the circuit board, fixed into the shell, or connected by contacts or wires. The new shell must leave enough room for the battery and must position the access point correctly. A battery may physically fit while the cover cannot close, or the contacts may fail to touch because the replacement recess is a different depth. Confirm these details from current product information instead of relying only on the “two-button” description.
Do not assume that the transponder chip is part of the remote circuit board. Depending on the key variant, the security component may be a separate insert or another removable part inside the original casing. Locate it before disassembly and check whether the replacement shell has the matching pocket, channel or retaining feature. If the listing does not show where the transponder chip is held, request confirmation that the original component can be transferred; remote-board compatibility alone does not settle this question.
Make a component checklist before opening the old key: circuit board, battery and holder, button pads, transponder, retaining clips, screws and any small spacer or insert. Compare the complete list with the replacement shell’s internal space. Every original part needs a defined position, and no component should be loose, pinched or forced into a cavity intended for something else.
Finally, plan the transfer as a controlled inspection, not a test of strength. Open the old shell over a clear surface, photograph each component in place and use a suitable plastic tool where clips must be released. Avoid levering against the circuit board or bending battery contacts. If the old casing resists opening, or the transponder’s position is unclear, stop and verify the particular variant before ordering or disassembling further.
Do Not Overlook the Blade and Mechanical Key
A shell may accept the original remote parts and still fail as a usable key if its blade section is different. Compare the blade opening in the replacement with the original key: its width, depth, shape and position must allow the blade to sit fully in place. Also check how it is retained. A folding blade may use a pivot, pin or clip, while a fixed blade may slide into a channel or lock into a separate insert. The replacement must use the same attachment principle, not merely a similar-looking opening.
Do not confuse the blade shape with the remote-button layout. Two keys can both have two buttons while using different blade profiles, different blade positions or different ways of attaching the metal section. Conversely, a shell with a matching-looking blade opening may have buttons intended for another remote design. For an Opel Insignia two-button key shell, compare the mechanical key separately from the two-button remote.
Identify whether your original key is folding or fixed-blade construction. With a folding design, check the hinge area, pivot location and the space needed for the blade to fold completely into the casing. With a fixed blade, check how far the blade enters the shell and what prevents it from rotating or pulling out. If the listing does not show these details clearly, ask for a picture of the open shell or the exact blade-retention arrangement before ordering.
Next, confirm what the product actually includes. Some listings supply only the casing; others may include a blank key blade, blade insert or mechanical section. “Blank” means the metal still needs to be cut to match the original key. Do not assume that a photograph showing a blade means it is already cut or ready for use.
Blade cutting is a separate task from transferring the remote electronics and the transponder chip. Moving the original components into a compatible casing will not make an incorrectly shaped or uncut blade operate the lock. Before using the key, confirm the blade format and cutting requirements with a qualified local key provider in Lithuania, and take the original key when asking whether the blank can be cut. If the blade type or attachment method cannot be verified from the listing and your original key, treat key shell compatibility as unresolved rather than relying on the vehicle model and button count.
Know When a Shell Is Enough—and When It Is Not
A shell-only replacement is appropriate when the original key’s working components are still available and can be transferred safely. This usually means the remote electronics, battery holder, transponder chip and usable blade arrangement are present, while the outer casing is cracked, worn or no longer closes properly. In that situation, an Opel Insignia key shell can solve a casing problem without replacing the components that already belong to the vehicle.
A replacement Opel key shell is less suitable when a required component is missing, broken or difficult to remove without damage. For example, a damaged circuit board, lost transponder chip or unusable folding mechanism may leave you with no complete set of parts to transfer. If the original key cannot provide all the necessary components, compare a complete replacement key instead—but verify exactly what the seller supplies.
Do not treat a complete key as automatically ready for use. Key cutting and electronic programming are separate tasks. A key may include a blank key blade that still needs to be cut to match the vehicle’s mechanical lock. Its remote functions or transponder may also require programming, depending on the vehicle and the product. Confirm these requirements before ordering rather than assuming that a new case, blade and buttons form a working key.
Read the product contents line by line. Check whether the listing includes only the Opel key casing, a blank or cut key blade, buttons, electronics, a battery, or a fully assembled key. Product photographs can show parts that are not included, so use the written contents and compatibility notes as the decision point. If the listing is unclear, ask the seller before paying.
For orders in Lithuania, also check the seller’s identifying information, contact details, return conditions and any compatibility-related exclusions. Keep the listing and your questions in writing. A return may be harder if a blade has been cut or a product has been modified, so clarify those conditions before ordering. The safest choice is the option whose contents, transfer requirements and after-sale terms match the condition of your existing key.
Before buying an Opel Insignia key shell, treat the vehicle model and button count as only a starting point. Compare the old key’s outer profile, blade position, opening method, button layout, transponder location, and circuit-board shape with the replacement listing or photos. If any of these differ, do not assume the parts will transfer—ask the seller to verify compatibility using the exact key details, especially when ordering online in Lithuania. The safest choice is the shell that matches the physical key and internal layout, not merely the car’s name.
- Shell replacement changes the outer casing.
- Blade cutting creates the correct mechanical key shape.
- Complete-key programming concerns a different replacement scope.
Choose the option that matches your vehicle and situation.
Frequently asked questions
Does a two-button layout prove that an Opel Insignia key shell will fit?
No. Two buttons only narrow the search. The shell must also match the key’s physical shape, seam, internal supports, circuit-board layout, battery position and blade arrangement. Compare your existing key with current product photos and compatibility details rather than relying on the button count alone.
Which photos should I take before ordering an Opel Insignia key shell?
Take clear photos of the front and back, both sides, the blade area and the casing seam. If possible, photograph the opened key as well, showing the circuit board, battery compartment, transponder area and retaining features. Use good lighting and keep the camera square to the part so details are not distorted.
Can I transfer the circuit board from my old key into a new shell?
That depends on more than the board’s general appearance. Check its shape, mounting points, button positions, battery arrangement and the recesses inside the replacement shell. A board may fit physically but still sit incorrectly, press against the casing or prevent the shell from closing securely.
Does the transponder always move with the remote circuit board?
Not necessarily. The transponder may be separate from the remote circuit board, and its position can vary between key versions. Identify it before throwing away the old casing. If it is not transferred correctly, the remote buttons may still appear suitable while the vehicle does not recognise the key.
Can a replacement shell work with the remote but not the car’s physical lock?
Yes. The casing and remote electronics may be compatible while the blade is the wrong format, incorrectly positioned or supplied uncut. In that situation, the buttons can function, but the key may not operate the vehicle’s mechanical lock. Confirm whether a blade is included and what cutting is required.
Does replacing the casing require programming the key again?
A casing change does not necessarily mean programming if you retain the original compatible circuit board and security components. That is different from buying a complete key with new electronics or other replacement components. Before ordering, establish whether the listing is for an empty shell or a complete key.
What should I check if the replacement shell looks right but will not close?
Check that the circuit board is facing the correct way and that the battery has enough clearance. Also inspect the transponder position, button seating, clips and internal recesses. Do not force the casing shut: pressure can damage the board or clips and may indicate that the shell is internally incompatible.
What product details should I confirm before ordering from Lithuania?
Check the listing’s current photos, stated dimensions, included parts, compatibility wording and return terms. Confirm whether it includes only the casing, a blade, buttons or additional components. If the description is unclear, ask the seller for details based on your key’s photos rather than assuming that delivery within Lithuania confirms compatibility.
