
- Exterior photos can narrow down a shell by shape and button layout, but they cannot establish how its internal supports hold your components.
- Compare the original key and listing from matching front, back, side and blade-end views; a similar front alone leaves important differences unseen.
- Ask for clear photos of both open shell halves to assess the board space, supports and battery area against the parts you need to retain.
- If the original key is sealed, its internal layout may remain unknown without opening it; do not treat an exterior match as confirmation.
- Check blade attachment separately from casing shape, because a shell that accepts the electronics may still use a different blade fitting.
- A vehicle-model claim or reassuring seller description cannot replace missing fit evidence; leave compatibility unresolved until the relevant details can be checked.
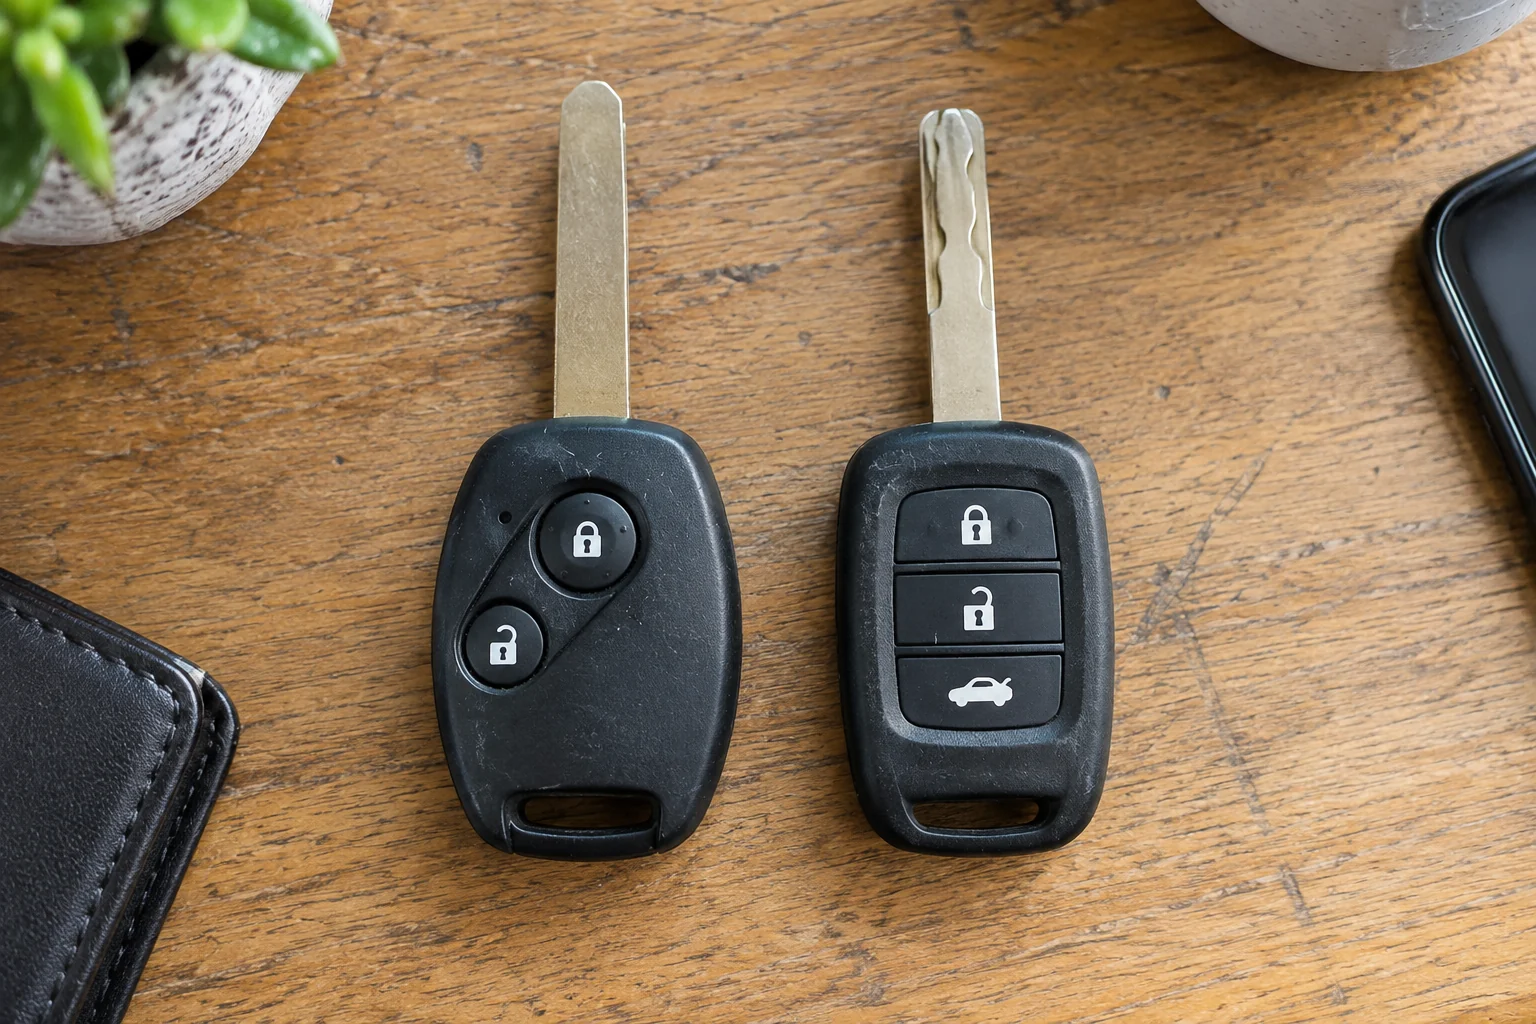
If a replacement key shell listing shows only the outside, treat a matching shape as a starting point, not proof that your existing parts will fit. Exterior photos can help you compare the button layout, blade style and overall outline. They cannot show whether the circuit board has the right supports or whether there is a suitable place for a separate transponder chip.
That distinction matters even when the listed shell looks almost identical to your key. Small differences inside the case can keep a board from sitting flat or prevent the halves from closing properly. Without interior photos, you have no reliable way to judge those details from the listing alone.
If you are comparing shells on car-keys.lt, make your next step a request for clear photos of both open halves rather than relying on the outside view. You can then compare the internal layout with your own key, provided you can open it without damaging its components. You do not need to establish compatibility from a photo alone; you need enough evidence to decide whether the shell remains a plausible choice or whether the seller must clarify a mismatch. The details worth checking, and the limits of what photos can confirm, are covered below.
What exterior photos can—and cannot—confirm
Start with a like-for-like comparison: place the listing’s front, back, side and blade-end views beside photos of your existing key taken from the same angles. A front view is useful for spotting a different button layout, but it leaves much of the case unseen. If the listing shows only the front, treat it as enough to shortlist the shell, not enough to confirm a match.
Count the buttons and compare their order, spacing and shapes. Check whether the button panel reaches the same edges and whether features such as a raised ridge or a separate-looking panel appear in the same place. A three-button shell is not necessarily the same design as every other three-button shell. Small differences become easier to see when both keys are upright in the images.
Next, compare the case outline from more than one view. Look at the width of the rounded end, the taper toward the blade end, and the position of any visible seam or key-ring opening. The side view can reveal a difference in thickness that a front view hides. If one angle matches but another clearly does not, the exterior match is weak.
Use the blade-end photo to compare what is visible there: the shape of the end, the direction the blade points when shown, and the surrounding casing. This view can rule out an obvious mismatch in the photographed shell. It cannot, by itself, establish key blade mount compatibility; that needs a separate check. Likewise, a matching button layout does not establish key shell circuit board fit.
Allow for how the photos were taken. A key photographed close to a wide-angle phone camera may look broader at one end, while a tilted case can make buttons seem closer together. Wear can round the edges of your old key or flatten its markings. Image scale is also unreliable unless both photos include a dependable size reference, so compare proportions rather than apparent millimetres.
Exterior agreement is most useful for eliminating visibly different shells and narrowing the choices. It is not proof of replacement key shell compatibility: two cases can look alike when closed yet differ where the existing parts must sit. If no key shell interior photos are shown, record which exterior features agree and which remain unclear, rather than treating a convincing front photo as confirmation of internal fit.
Identify what must move from your existing key
First, establish whether the listing is for an empty shell or a complete replacement key. An empty shell is a housing: it does not, by itself, replace the working parts of your key. Before judging whether its unseen interior might suit your key, make a list of what you would need to move from the original. Do not treat “replacement key” in a title as proof that working electronics or a cut blade are included; check the stated contents.
The main item is usually the circuit board that operates the remote buttons. Your key may also contain a transponder chip used for starting the vehicle, a battery, battery contacts, a rubber button pad or other small pieces that are separate from the housing. Include the existing blade in your inventory if you intend to reuse it, but assess its attachment separately. Note which parts are actually present, rather than copying a list from a similar-looking key online.
Do not assume that every part is separate. In one design, the transponder may be a small loose chip that is easy to overlook when the case opens. In another, its function may be built into the circuit board. Likewise, some keys have a removable battery, while others do not have a battery you can transfer. A button pad may lift out as one piece or be part of the case itself. These differences change what an empty shell needs to accommodate and what, if anything, must be transferred individually.
If your original key has a battery cover or is designed to open for battery replacement, you may be able to identify some parts without dismantling the whole key. Keep track of any loose pieces and their positions if you open it in the normal way. A sealed or damaged original is different: its construction may remain unknown until it is opened, and forcing it apart can damage the only working key you have.
You do not need to take that risk just to resolve an unclear listing. Record what you can establish safely, such as whether the key has an accessible battery and whether any removable parts are visible. Mark the rest as unknown. That gives you an honest component inventory without mistaking an assumption about your original key for evidence about the replacement shell.
What photos of the open shell need to show
Ask for clear, well-lit key shell interior photos of both open halves, photographed straight on. A picture of only the deeper half can hide the features that hold the circuit board from above or press against it when the case closes. The images should show the entire inside edge, not just a close-up of the central cavity. If small tabs are hard to make out, an angled close-up can help, but it should supplement—not replace—the full view.
Start with the space for the circuit board. Compare its shape and orientation with your existing board, if you can see it without opening a sealed key solely for this check. Look beyond whether the board appears to fit inside the outline: note where the shell’s posts, ribs and raised supports meet its edges. A support in the wrong place may prevent the board from lying flat; a cavity that is too open may let it shift. A similar cavity outline alone does not establish secure seating.
Next, identify what actually keeps the board in position. Depending on the design, that may be moulded clips, slots, screw posts or pressure from the other half of the case. The photos need to show those retaining points clearly enough to compare their locations with the board’s notches, holes and edges. Check their height as well as their position where the image allows it: a post can line up from above yet still hold the board too high for the case to close.
Trace the buttons from the inside. Each button or inner rubber pad needs to meet the corresponding switch on the circuit board. Compare their spacing and order, then look for guides that position the pad or prevent it from sliding. A shell can have the right number of buttons on the outside while placing an internal contact slightly off-centre. That difference may leave a button with poor travel or cause it to press beside the switch rather than on it.
Inspect the battery area according to how your key is built. If the battery sits in the shell, look for the holder’s shape, contact positions and clearance around its edges. If it sits on the board, check that the opposite half has room for the battery and any contacts projecting from the board. Interior photos should also make it possible to see whether a nearby rib or post would interfere. Do not infer battery clearance from the overall size of the cavity.
Finally, look at how the two halves meet around the seated parts. The inner rims, clips and screw posts should be visible, along with any raised areas on the opposing half that bear on the board or button pad. Photos of the shell closed with matching components in place, if available, can reveal a gap or uneven seam that separate open views cannot. An empty shell snapping shut shows that its halves mate; it does not show that they close properly around your components.
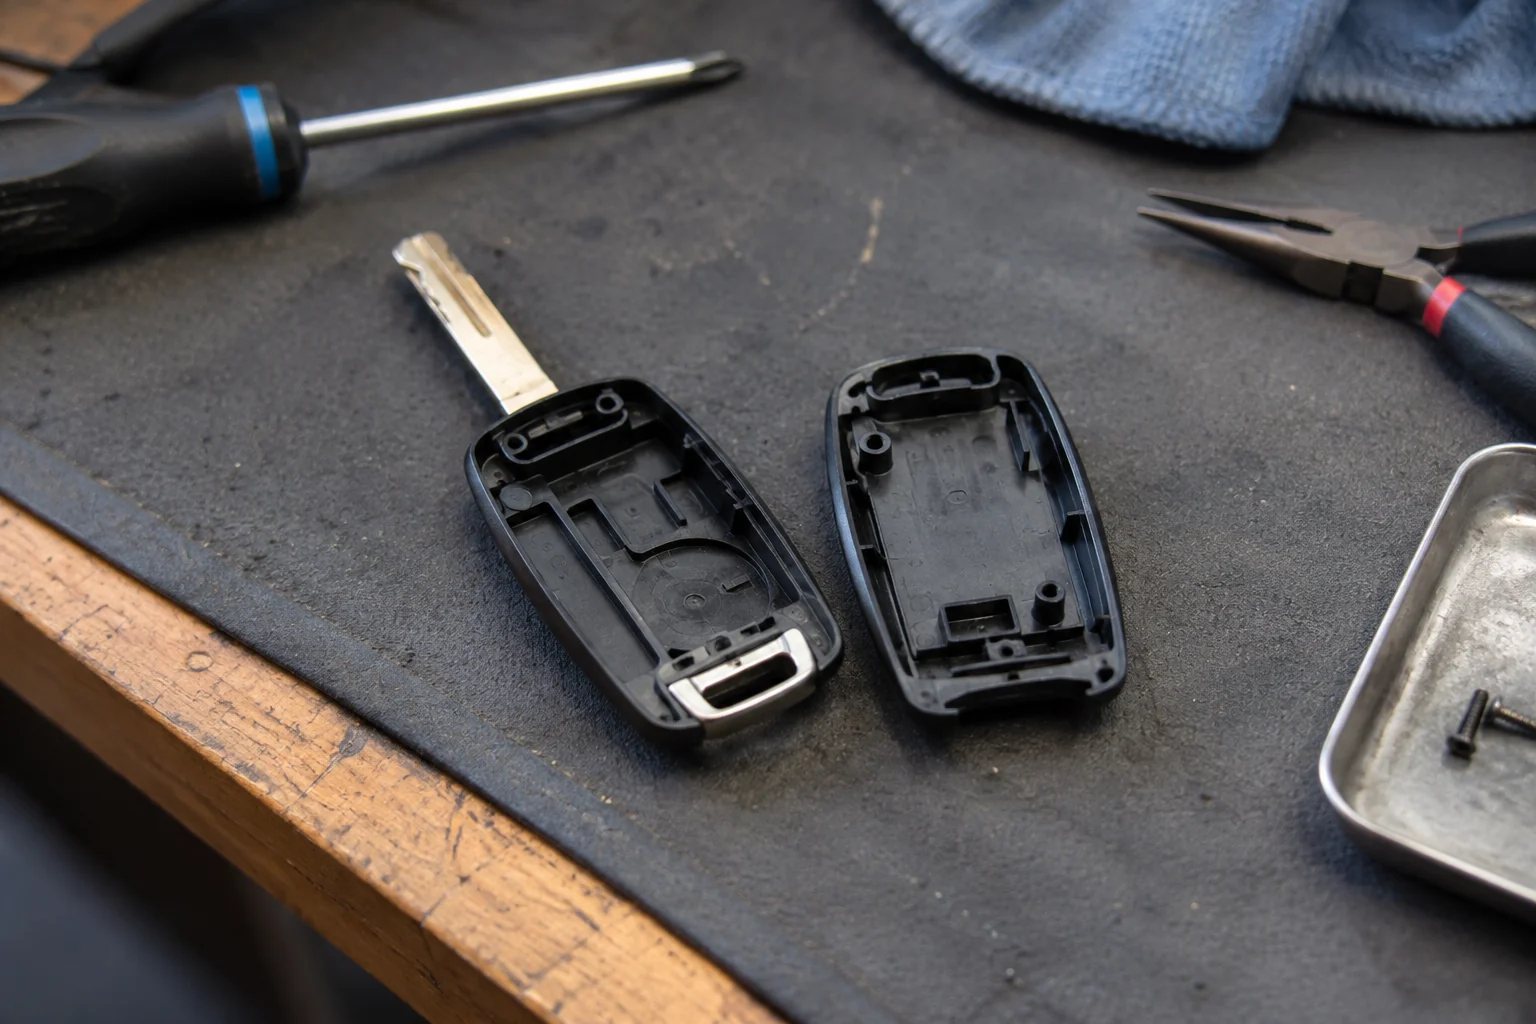
- Both shell halves, open and in focus
- Close-ups of the board supports and button area
- A clear view of the battery area
- The blade attachment and blade-end opening
Check the blade fitting separately
A shell that holds your existing components may still be unusable if it cannot take the blade you intend to use. Check the blade-end view for the way the blade joins the housing, not just the outline around it. Is the blade held in a removable carrier, secured by a pin or screw, or built into a part that cannot be transferred separately? A similar-looking nose does not establish that the mounting points match.
If you plan to reuse your cut blade, establish exactly what has to come across with it. On some designs, the metal blade can be separated from its holder; on others, the holder or pivot assembly may need to move as one piece. The replacement must accommodate the part you can actually remove, not merely a blade of similar width. Compare the attachment end of that part with a clear view of the listed shell’s blade fitting. If either end is hidden, blade reuse remains unconfirmed.
For a folding key, inspect the hinge or pivot as a separate fit point. Compare where the pivot sits, how the blade holder attaches and, where visible, how it is retained. Also check that the blade would fold into the case in the correct direction and sit in its recess when closed. Matching button placement does not tell you whether a pivot assembly will seat or operate correctly. A photograph of the key extended may hide the joint that matters.
A shell supplied with a different blade presents a different question. It does not prove that your original blade can be transferred, even if the supplied blade looks similar. Conversely, a new blade would need the appropriate profile and cutting before it could replace an existing cut one. Keep “can I reuse my blade?” separate from “could a different blade be prepared?”; a listing may provide enough detail to assess one but not the other.
If the attachment is concealed and the listing only shows the closed key, treat key blade mount compatibility as unresolved. Do not let a plausible casing shape—or a confirmed electronics fit—stand in for evidence about the blade connection.
Ask for the missing evidence before deciding
If a listing shows only the outside of the shell, ask the seller for evidence of the exact item and variant you would receive. A short, specific request is more useful than “Will this fit my car?” You could send:
“Could you send clear photos of both open halves of the shell in this listing, plus a close-up of the blade attachment? Please confirm that the photos show the same variant you would ship, rather than a similar shell. I plan to transfer the parts from my existing key and need to check whether they can be fitted.”
Include the listing link or item number, particularly if the seller offers several similar shells. If you can photograph your original key without opening it, attach a clear image and say which blade you intend to use. That gives the seller a reference without asking them to guess from a vehicle model alone. Keep the conversation with the listing where possible, so the reply can be matched to the item you considered.
Ask for measurements or identifiers only after the photos leave a specific question unanswered. For example, if two blade mounts look alike but their width is unclear, ask for the mount width and measure the corresponding part of your key if you can do so safely. If the seller cites a mould number or other marking, ask where it appears on the shell in the listing. A number is useful only if you can connect it to the part being sold and, where relevant, to your original; it is not a substitute for the missing views.
Treat a vehicle-model list as a way to find candidates, not as proof of replacement key shell compatibility. The same applies to a reply that simply says “yes, it fits.” If the seller cannot provide the requested views, ask what that assurance is based on. A photo of another version, a catalogue description or a general model match may still leave the fit question open.
If you cannot check a critical detail, record the fit as unresolved, even if the outside looks right. You can look for a listing with better evidence, or decide whether to accept the remaining risk. Before ordering under uncertainty, read that listing’s return terms: check whether an opened or assembled shell can be returned, who pays return postage, and whether the return address and process are clear for an order delivered to Lithuania. Return terms may limit the cost of a mistake; they cannot establish fit.
When a listing shows only the outside, treat a matching shape as a starting point, not proof that your existing components will fit. Ask for clear photos of the opened shell showing the circuit-board space, button positions and any transponder compartment. If you plan to reuse the blade, check its mounting point too. Compare those details with your current key before ordering. If you cannot check the inside, do not rely on the exterior shape alone.
Choose the option that matches your vehicle and situation.
Frequently asked questions
Does moving my existing electronics into a new shell require programming?
Changing the housing alone does not determine whether programming is needed. It depends on the key’s design and which parts you move across. If you retain the original electronics and transponder, that is different from replacing either one. Check what the shell includes and what your original key contains before treating the job as a simple casing swap.
What if my original key is glued or difficult to open?
Do not force it open just to inspect the contents. You could damage parts that need to be reused, and some keys are not easy to open without suitable tools. If you cannot inspect yours safely, seek qualified help. You can use car-keys.lt as a starting point while deciding what to do before buying a shell.
Does a part number printed on the outside settle compatibility?
No. A matching marking is a useful identifier, but it cannot show whether your board and other retained parts will seat correctly inside the candidate shell. Treat it as one clue, not a fit test. If the listing lacks interior views, ask for them before relying on the printed number.
Should worn button pads be transferred with the electronics?
Not automatically. Check whether the candidate shell includes pads or is designed to take the originals, and whether the pad shape and button positions match. If your old pad is split, flattened or sticky, moving it may bring the same button problem into the new housing.
How can I compare size when listing photos have no scale?
Ask for measurements rather than judging size by eye. Measure your existing case at the same points, such as its overall length, width and thickness, then compare the figures. Camera angle and cropping can make two shells look alike even when their dimensions differ.
Does a working remote signal mean its board will fit the new case?
No. A signal test tells you that the remote transmits under the conditions of that test; it does not check physical fit. The board could still sit at the wrong height, leave buttons misaligned or prevent the case from closing without pressure.
What should I check if the key has a removable emergency blade?
Check that the candidate case accepts the same blade insert and uses the same retaining arrangement. A similar-looking opening is not enough to establish that the blade will lock in place. If this area is unclear in the listing, ask for a close-up.
Is a key shell the same purchase as a complete replacement key?
Not necessarily. A shell may provide only the housing, while the components supplied with any replacement key depend on the listing. Read the included-parts description rather than assuming that a pictured blade, remote board or transponder comes with it.
