
- Photograph the front and back of the existing key clearly; a button-side image alone leaves the reverse housing unseen.
- A side view can reveal the case profile, seam and thickness that a straight-on photograph may conceal.
- Show where the blade meets the housing, because blade attachment is a separate compatibility question from button layout.
- If the key is already safely open, clear images of both interior halves can help compare spaces and supports for retained parts.
- Take comparable angles of your key and the proposed shell so visible differences are easier to identify.
- Photos cannot confirm hidden internal fit in a sealed key; leave that question unresolved rather than opening a working key solely for pictures.
To ask whether a replacement key shell might fit, photograph the key you actually use, not just the vehicle or a product listing. Take clear views of both faces and the edges, with the buttons, blade and any markings visible. A plain background and good light will do more for the comparison than a carefully staged photo that hides part of the key.
Photos can help someone compare the outside shape and visible details with a proposed shell. They cannot prove that the circuit board, battery holder, blade mounting point or internal supports will fit inside it. Two keys can look almost identical when closed but differ where the parts meet.
Whether your question starts on car-keys.lt or elsewhere, photos of your own key give you something more specific to compare than a vehicle model alone. You do not need special equipment, but sharp images from more than one angle matter: a blur over a small marking or a thumb covering the blade joint can conceal the detail that settles a question. This guide explains which views are worth taking, how to keep those details readable and when photographs alone are not enough.
Set up photos that can actually be compared
Start with one clear photograph of the whole key. Place it on a plain, matte surface that contrasts with its colour, and leave a little space around every edge. This gives the person reviewing your photos a reference for later close-ups; if the first image crops off part of the key, it may be hard to tell where a close-up was taken. Keep other keys and loose objects out of the frame unless you need them to hold the key still.
Use even light so the housing is visible without bright reflections or deep shadows. Daylight near a window often works better than a flash aimed straight at a glossy case. If a reflection hides a seam, move the light or change your position slightly rather than trying to fix the image afterwards. Check the photo on your screen before moving the key.
Keep the camera steady and let it focus on the key, not the background. For close-ups, tap the area you want sharp, then inspect the saved image at normal size and zoomed in. Seams and connection points should have defined edges rather than a soft blur. If the phone cannot focus because it is too close, pull back a little and take another shot. A sharp photograph from slightly farther away is more useful than a larger, blurred one.
Keep the key’s orientation consistent throughout the set. For example, if its top points towards the top of the first photo, keep it that way in the next shot unless you need to turn the key over. When you do turn it over, keep the same end pointing upwards. This makes it easier to follow which features line up across images.
Before sending the photos, review them as a set. Make sure the whole-key image is included, close-ups can be placed in context, and no important edge disappears into shadow or out of frame. Retake an unclear image rather than sending several near-identical blurry ones.
Capture the front, back and side of your key
Start with a photograph of the complete button side, including the outline of the housing. The number of buttons matters, but so do their shape and arrangement: three buttons in a vertical row are not the same exterior layout as three buttons grouped around a central one. Show any separate panic button or blank area where another version of the case might have a button. Worn symbols are fine; the button positions and surrounding plastic are often more useful than the icons.
Next, turn the key over and photograph the entire reverse housing. A button-side match can hide a different back cover. Look for visible features such as a screw recess, a badge recess, moulded lettering, or a raised panel, and make sure their positions can be seen in relation to the case outline. If a label covers part of the back, leave it in place and show what remains visible rather than removing anything just for a photograph.
Add a side-profile view so the case’s apparent thickness is visible. Two housings can have similar front outlines but quite different depths: one may have a rounded, bulky back, while another is nearly flat. Photograph the edge where the front and back halves meet. The seam may run centrally around the case or sit closer to one face, and a lip or step along it can change the exterior shape noticeably.
One side view may not show the whole story. If the opposite edge has a different contour, a notch, or a change in the seam, photograph that edge too. Pay particular attention to corners: a case that looks rectangular from the front may taper, flare, or curve when viewed from the side. These are useful differences to show when asking about fit, even if you cannot measure them reliably from a photograph.
Use an exterior close-up only when a feature is too small to judge in the complete views. For example, a closer view might show whether a screw recess is round or oval, or whether the seam continues around a corner. Keep enough of the neighbouring housing in the image to locate the detail. An isolated patch of plastic, with no recognisable edge or button nearby, is difficult for someone else to place.
A practical exterior set is therefore a complete button-side view, a complete reverse view, and side views that show the profile and seam. Add close-ups for particular features that those views do not resolve. These photos document the shape of the housing; they do not, on their own, settle every question about a replacement shell.
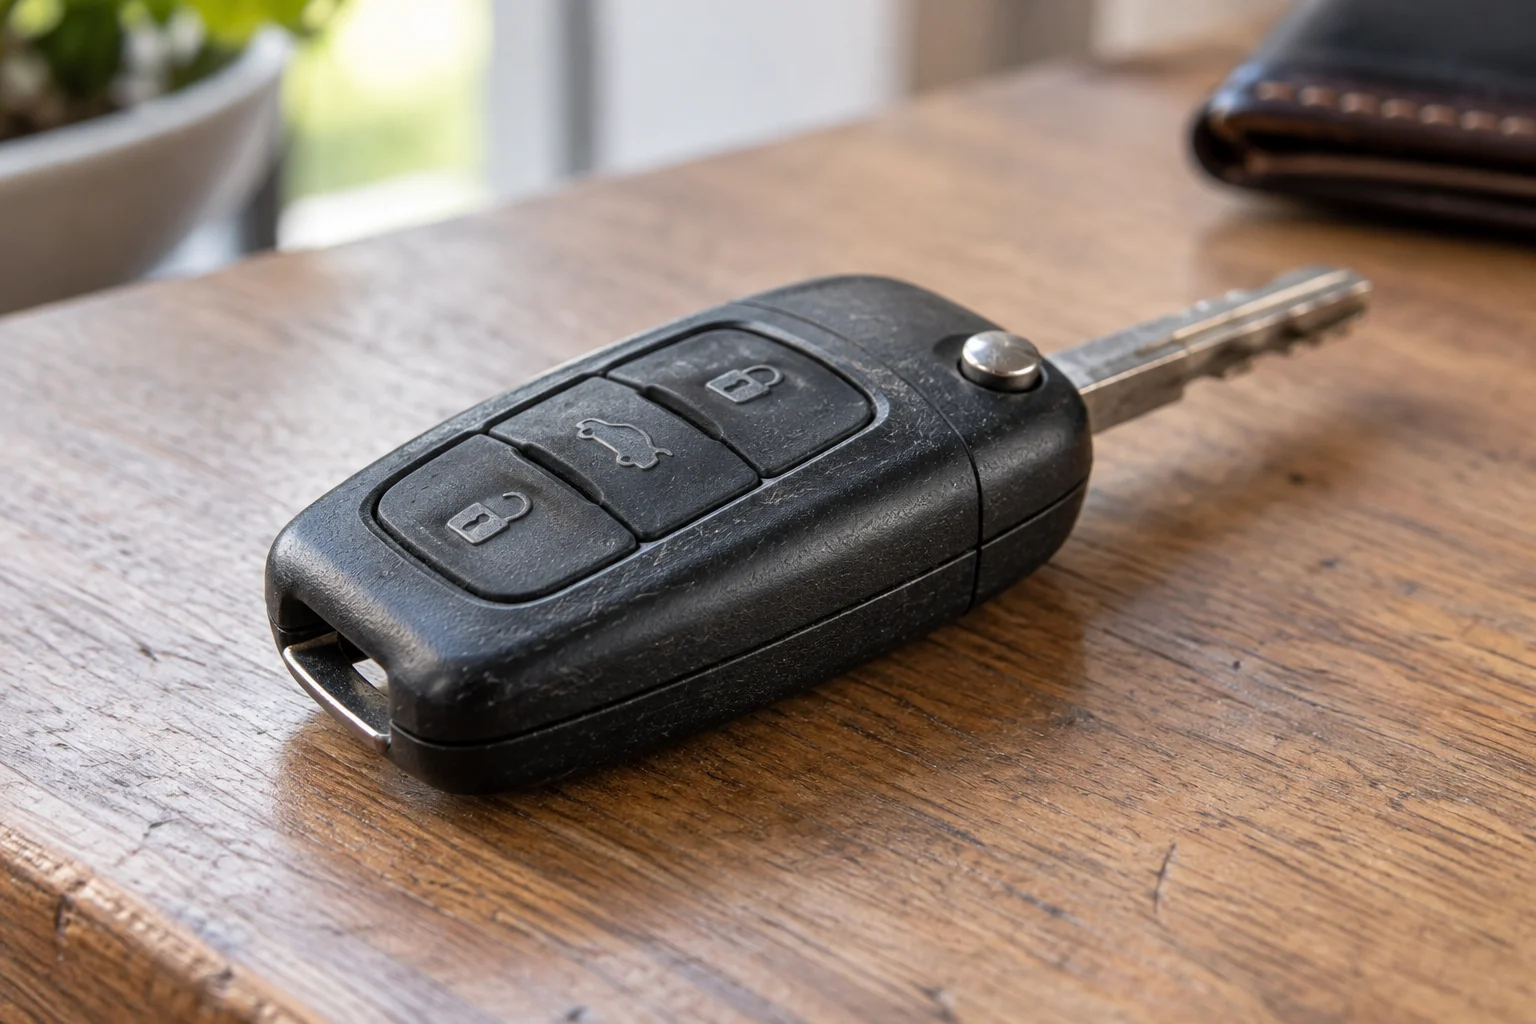
Show where the blade meets the housing
Take a close-up of the point where the metal blade enters the housing, not just the length of the blade. Include enough of the surrounding case to show which side you are viewing. A photo aimed straight at the join can show the blade’s width and where the plastic begins. Add a slightly angled view to show whether the blade sits flush against the housing, passes through a raised collar or meets a visible shoulder. Those details may disappear when photographed from only one direction.
Keep the join sharp and clear of fingers. If you need to hold the key upright, grip the opposite end; a thumb over the blade’s base can hide the very feature someone needs to inspect. Check the image at full size before sending it. If the metal edge is crisp but the point where it enters the case is blurred, retake the photo with the camera focused on that point.
For a fixed blade, photograph both broad faces near the housing and at least one narrow-edge view. The aim is to show the shape of the exposed blade base and how it meets the case. If plastic covers the base completely, photograph what is visible rather than trying to pull the blade out. Say that the attachment is concealed; an exterior photo cannot establish the shape of a hidden fitting.
For a folding blade, show it fully extended and folded into its normal resting position. With it extended, photograph the area around the pivot from the side and at an angle, including any externally visible metal at the base. With it folded, show where the blade lies in the housing and which way it turns. If the mechanism will not stay in an intermediate position on its own, there is no need to make it do so for a photo. Do not force a stiff blade or move it beyond its normal travel.
Matching button layouts do not establish that a blade will fit a replacement shell. Two keys may look similar on the button side while the blade meets the housing differently. Conversely, a photograph may show no obvious difference yet leave the attachment itself hidden. Treat the blade-to-housing junction as a separate question, and make clear when your photos cannot show enough to answer it.
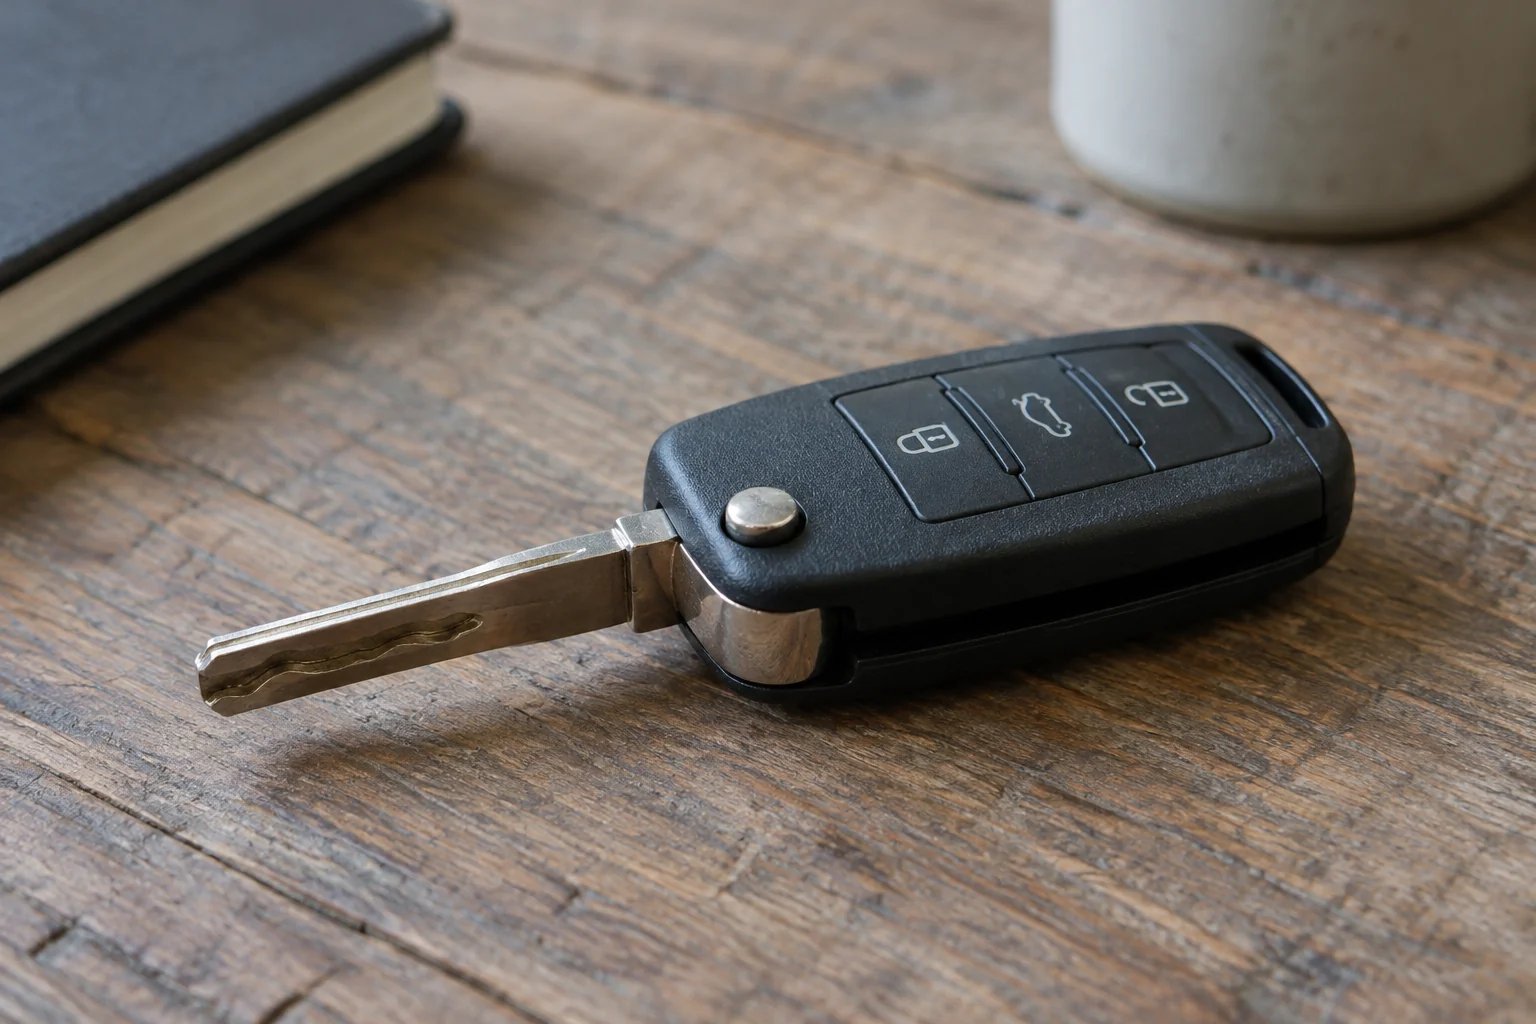
- Complete button side
- Complete reverse side
- Side profile and seam
- Clear view of the blade-to-housing connection
If the key is already open, photograph both interior halves
Only take interior photographs if the key is already safely open. Do not prise apart a working key just to complete a photo set: clips can break, and small parts may shift or fall out. If the housing is sealed or you are unsure how it opens, leave it closed. Say that you cannot show the inside; photographs of a sealed key cannot establish how its unseen parts will sit in another shell.
Before lifting out a battery, board or any loose piece, photograph the open key exactly as you found it. Take one image that shows both halves together in their current positions, then a clear image of each half. This preserves useful context if a part later moves. Keep the halves distinct in the photos—for example, place them side by side rather than stacking one over the other.
For each half, show the full inside surface before taking close-ups. Include any visible recesses, raised supports, screw holes, clips or channels, particularly where a retained part appears to rest. An angled image can make the height of a support or the depth of a recess easier to see than a straight-down view. Describe these features by their appearance rather than guessing what they do; similar-looking details may have different roles in different keys.
If something has already come loose, photograph it beside the half it came from, with its original position visible if you know it. A small screw beside its hole, for instance, gives more context than a close-up of the screw alone. If you do not know where a piece belongs, keep it separate and say so rather than placing it where you think it goes. Avoid moving parts between halves for a tidier picture, as that can make the original arrangement harder to understand.
If a component obscures a space beneath it, photograph what is visible without removing the component solely for the photo. Note the obstruction when you send the images. That distinction matters: an empty recess you can see is useful evidence, while a recess you assume is underneath a board is not. Interior photos can document an already-exposed layout, but they should not come at the cost of disturbing a key that is otherwise intact.
- Do not open a working key solely to obtain interior photos.
- State that internal fit remains unconfirmed when its parts are not visible.
Pair your photos with the proposed shell’s views
Before sending a fit question, look at the actual photos in the proposed shell’s listing. Note which views are available rather than relying on a description such as “same as original”. Put your button-side photo beside the listing’s front view, the reverse beside its back view, and the side profile beside its side view. This like-for-like arrangement makes differences easier to spot than a collage of unrelated angles. If the listing has no side or blade-end view, say so instead of making a comparison that the images cannot support.
Include a link to the proposed shell, or enough listing information to identify the exact item you mean. A screenshot can help if it shows the variant you selected, but check that it matches the item linked: a listing may show several shells with different button layouts or blade ends. Treat any compatibility claim in the listing as something to check, not as evidence that your key’s parts will fit.
Point to specific visible differences in your message. For example: “The buttons are in the same positions, but the proposed shell appears to have a different seam near the blade.” If you cannot tell whether a feature matches because the listing omits that angle, name the gap: “I’ve included a photo of my blade connection, but the listing does not show its connection point.” This gives the person answering a useful distinction between a mismatch they can assess and a detail they cannot see.
Also say whether your key is sealed or already open. If it is open and you have interior photos, pair each half with a corresponding shell view only if the listing provides one. If it is sealed, say that no interior comparison is available. Do not describe unseen clips, supports or component positions as matching based on the exterior alone.
You can put the question plainly: “These are photos of my key, and this is the shell I’m considering. Do the visible housing and blade-connection details appear to match? The listing does not show a side view, and my key is sealed. What fit questions would remain before I could rely on this comparison?” Adjust the wording to reflect what your photos and the listing actually show.
Photographs can support a judgement about visible shape and layout. They cannot prove that parts hidden inside a sealed key will seat correctly, or resolve a missing listing view. If the answer depends on either, ask what additional view or identifying detail is needed rather than treating a similar appearance as confirmation of fit.
Send a small set of sharp photos showing the key as it is now: the front, back, side profile, and blade or emergency key fully extended. Include any visible part numbers. If the case is already open, add a clear photo of the inside, but do not force it apart for a picture. These views make it easier to compare the shell’s shape and layout. They cannot, on their own, confirm that the blade, electronics or immobiliser components will fit and transfer to a replacement shell.
Questions about photographing your key
Should I remove a protective cover before taking photos?
Yes, if it slips off easily without moving or disturbing any part of the key. An unobstructed photo makes the housing easier to see. If the cover is tight, damaged or awkward to remove, leave it in place and mention that it may hide some details.
Do I need to put a ruler beside the key?
A ruler can give someone a sense of scale, especially when several shells look similar in photos. Keep it flat beside the key rather than across it. The ruler will not reveal the dimensions of internal clips, posts or other hidden parts, so it cannot establish fit on its own.
What if my key housing is cracked or missing a piece?
Photograph the damage clearly, including a wider view that shows where it sits on the housing. Say which original features can no longer be seen, such as part of the edge or a fastening point. A broken area can make an otherwise useful comparison uncertain, so avoid treating its current shape as the original one.
What if the markings on my key have worn away?
Photograph any characters that remain legible, using a sharp close-up and another view showing where the markings sit. Write down only what you can read with confidence. Do not fill gaps with characters that seem likely: one mistaken letter or number may point someone toward the wrong shell.
Can a short video replace photos of a folding key?
A video can show how the blade moves, particularly if its travel or resting position is unclear. Include sharp still photos as well: they let someone compare the key and proposed shell at fixed angles without pausing on a blurry frame. Hold the key steady in each photo rather than relying on a moving close-up.
Should I include a photo of a spare key?
Include it if you know it is relevant, but label it as the spare and keep its photos separate from those of the key you want to assess. Even keys used with the same vehicle may have different housings. State which key needs a shell so the spare is treated as a reference, not as another view of the same key.
Should I photograph a detachable blade separately?
If the blade is already detached, photograph it beside its housing so their relationship is clear. Add a close-up of the end that connects to the housing, without taking anything else apart. Keep the blade and housing identified as one key, especially if you are also showing a spare.
Should I post visible key numbers in a public fit request?
No. Crop or cover identifiable key numbers and similar markings before posting photos publicly. If those details are needed later, use an appropriate private channel. If you contact car-keys.lt about a proposed shell, keep any requested markings out of a public post while still providing clear photos of the key’s visible shape.
Choose the option that matches your vehicle and situation.
Frequently asked questions
Where can I find more information?
More information is available at car-keys.lt.
